[openwrt 설치] Xiaomi Mi Router 4A Gigabit
환경
- 저렴이 기가 공유기 보유중 이었는데, 샤오미 공유기 환경이 왠지 불편했다. (UI 도 그렇고, 중국 환경도 그렇고)
그래서, openwrt 를 설치 했다. 다행스럽게, 4A gigabit 모델은 설치 가능했다.
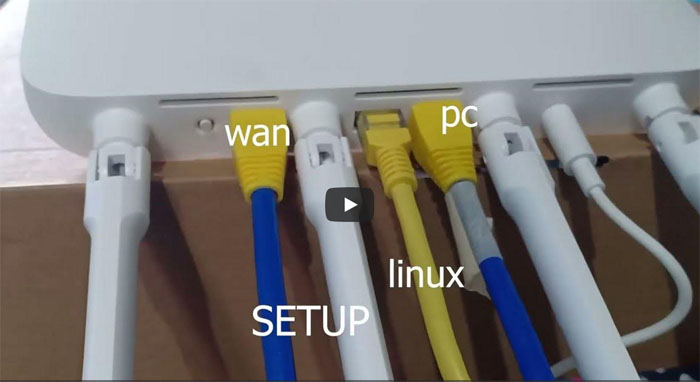
- 번거롭지만, wan 선을 연결했다.
- 노트북에 virtualbox 를 설치 후, ubuntu 를 설치 했다.
(마우스가 작동을 안해서, putty 연결 후 작업)
(노트북에 랜포트가 없어서, rj45-usb 변환 아답터를 추가구입)
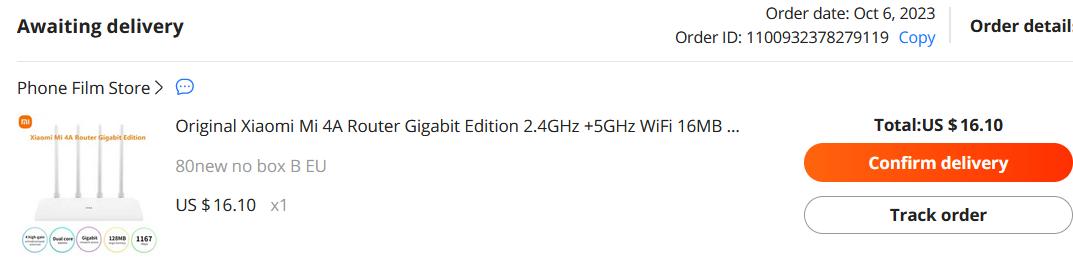
본인 공유기는 알리에서 구입했다.
중국어 버전이었다.
https://yes.ddonz.com/rhymix/board_nFic21/1731
깃허브 참고 페이지
https://github.com/acecilia/OpenWRTInvasion
위링크 중간쯤 firmware 에서 2.28.62 를 다운받아 설치 했다.
(원래 펌웨어가 무엇이었는지 기억이 안난다. 다운그레이드인지 업그레이드 였는지 모르지만, 설치는 되었다.)
그 후에, miwifi_r4a_all_f6025_2.28.503.bin 로 변경 후, 성공했다. (파일첨부)
참고한 유튜브
https://www.youtube.com/watch?v=IsxzkVnv2hg
이 영상에서 v2 를 사용했는데,
v1 모드로 하니, 성공했다.
$wget https://github.com/acecilia/OpenWRTInvasion/archive/0cc4fce4e38eb23c761d516942fa67762c4d4b26.zip
$unzip 0cc4fce4e38eb23c761d516942fa67762c4d4b26.zip
$cd OpenWRTInvasion-0cc4fce4e38eb23c761d516942fa67762c4d4b26$python3 remote_command_execution_vulnerability_v2.py #잘 안됨
$python3 remote_command_execution_vulnerability.py #성공, 주소창의 stok 값을 직접 넣어 줘야 함
$telnet 192.168.31.1
User: root
Password: root
$cd /tmp
$wget http://downloads.openwrt.org/releases/23.0... --output firmware.bin #정확한 링크는 아래 참조
$mtd -e OS1 -r write firmware.bin OS1
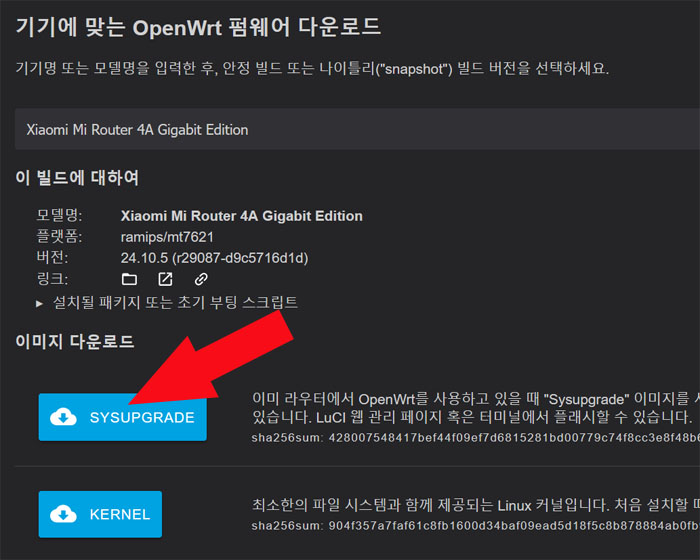
** 정확한 openwrt 링크 얻기
https://firmware-selector.openwrt.org/
에서, Xiaomi Mi Router 4A Gigabit 로 검색 후, sysupgrade 링크를 적으면 된다.
$wget http://downloads.openwrt.org/releases/24.10.5/targets/ramips/mt7621/openwrt-24.10.5-ramips-mt7621-xiaomi_mi-router-4a-gigabit-squashfs-sysupgrade.bin --output firmware.bin
* https를 http로 함
admin@u33:~/OpenWRTInvasion/OpenWRTInvasion-0cc4fce4e38eb23c761d516942fa67762c4d4b26
$sudo python3 remote_command_execution_vulnerability.py
Router IP address [press enter for using the default 'miwifi.com']: 192.168.31.1
Xiaomi router not found...
You need to get the stok manually, then input the stok here: ec8a81713659e83f997658799a93e24d
There two options to provide the files needed for invasion:
1. Use a local TCP file server runing on random port to provide files in local directory `script_tools`.
2. Download needed files from remote github repository. (choose this option only if github is accessable inside router device.)
Which option do you prefer? (default: 1)2
****************
router_ip_address: 192.168.31.1
stok: ec8a81713659e83f997658799a93e24d
file provider: remote github repository
****************
start uploading config file...
start exec command...
done! Now you can connect to the router using several options: (user: root, password: root)
* telnet 192.168.31.1
* ssh -oKexAlgorithms=+diffie-hellman-group1-sha1 -c 3des-cbc -o UserKnownHostsFile=/dev/null [email protected]
* ftp: using a program like cyberduck
admin@u33:~/OpenWRTInvasion/OpenWRTInvasion-0cc4fce4e38eb23c761d516942fa67762c4d4b26
$sudo telnet 192.168.31.1
Trying 192.168.31.1...
Connected to 192.168.31.1.
Escape character is '^]'.XiaoQiang login: root
Password: root
BusyBox v1.19.4 (2023-02-07 08:33:20 UTC) built-in shell (ash)
Enter 'help' for a list of built-in commands.-----------------------------------------------------
Welcome to XiaoQiang!
-----------------------------------------------------
$$$$$$\ $$$$$$$\ $$$$$$$$\ $$\ $$\ $$$$$$\ $$\ $$\
$$ __$$\ $$ __$$\ $$ _____| $$ | $$ | $$ __$$\ $$ | $$ |
$$ / $$ |$$ | $$ |$$ | $$ | $$ | $$ / $$ |$$ |$$ /
$$$$$$$$ |$$$$$$$ |$$$$$\ $$ | $$ | $$ | $$ |$$$$$ /
$$ __$$ |$$ __$$< $$ __| $$ | $$ | $$ | $$ |$$ $$<
$$ | $$ |$$ | $$ |$$ | $$ | $$ | $$ | $$ |$$ |\$$\
$$ | $$ |$$ | $$ |$$$$$$$$\ $$$$$$$$$ | $$$$$$ |$$ | \$$\
\__| \__|\__| \__|\________| \_________/ \______/ \__| \__|
root@XiaoQiang:~#
끝.